Let’s Create Space Plans!
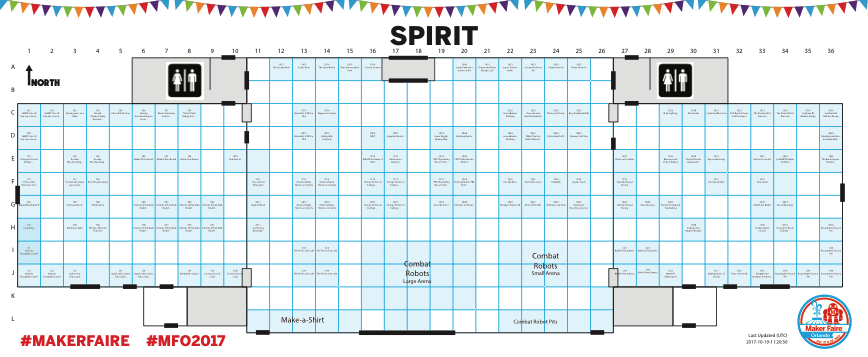
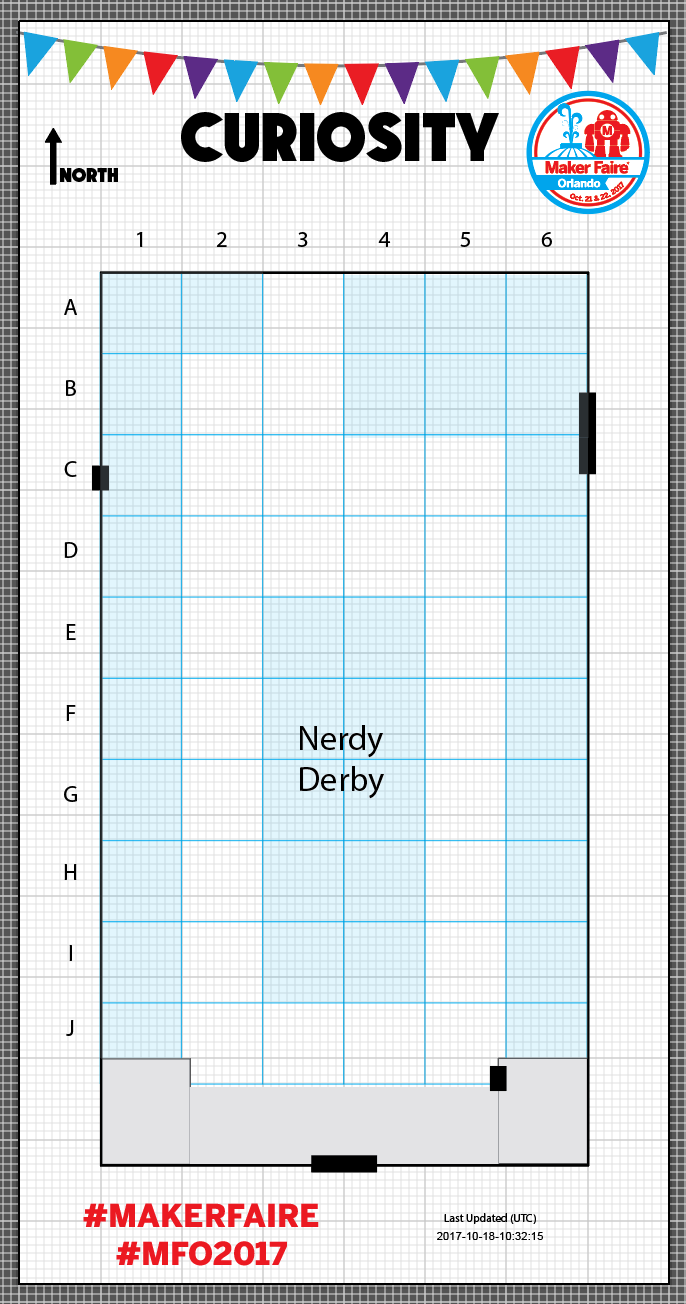
Example space plan from Maker Faire Orlando 2017
The Need
For Maker Faire Orlando, we need to place over 300 exhibits into spaces in multiple buildings, and we strive to provide our exhibiting makers, our attendees, and our volunteers a great map of the exhibit areas. While there are dedicated space planning tools that will allow layout and map generation, I wanted to see if it was possible with Illustrator and a little code to have the maps created automatically from space plan data in our homegrown event management system tied to our website.
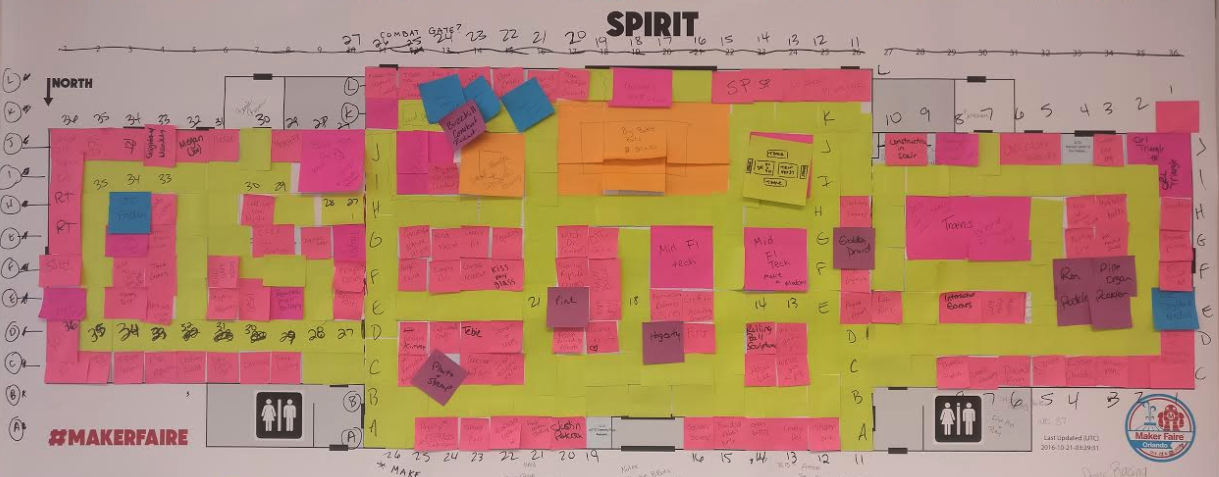
Our starting point is the prior year map printed to scale so that each post-it is a standard 10x10 space. The trick is to know when the space moves have slowed enough to move from post-its to digital maps.
Learning from Others
I went looking for ways to get data into Illustrator and found “Adobe Illustrator Variable Data — The EASY way!” (Note that I have archived this here in case that site isn’t there at some point in the future) This great post provides a great example of using Illustrator to create multiple items with imported data. Not quite what I wanted to do, but very helpful because it pointed me to a script called “Variable Importer” hosted on GitHub (and I forked the repo to make sure we have a copy available!) and showed how to install and use the script, AND how to create the data source .csv file.
Installing the Script
- Download the “Variable Importer” hosted on GitHub
- Click on variableimporter.jsx in the list of files
- Click the “Raw” button to view the code in a window
- Copy the raw code (You can also do this by clicking the copy button next to the trash can which copies the raw code directly)
- Paste the code into a new file called variableimporter.jsx using your text editor
- Make sure your file really is a .jsx file and not a .jsx.txt file (some editors assume that it is .txt and append it)
- Install the script into Adobe Illustrator (The following are Mac instructions, you’ll have to find the similar operation for Windows…)
- Open the Applications folder in Finder
- Open the Adobe Illustrator folder (if this launches Illustrator, you likely didn’t start in Finder)
- Open the Presets folder
- Open the language folder you are using. For me this is en_US
- Open the Scripts folder
- Put the variableimporter.jsx file in this folder
- Make sure Illustrator (application) is completely closed
- Open Illustrator
- Go to File -> Scripts
- Look for the Variable Importer script
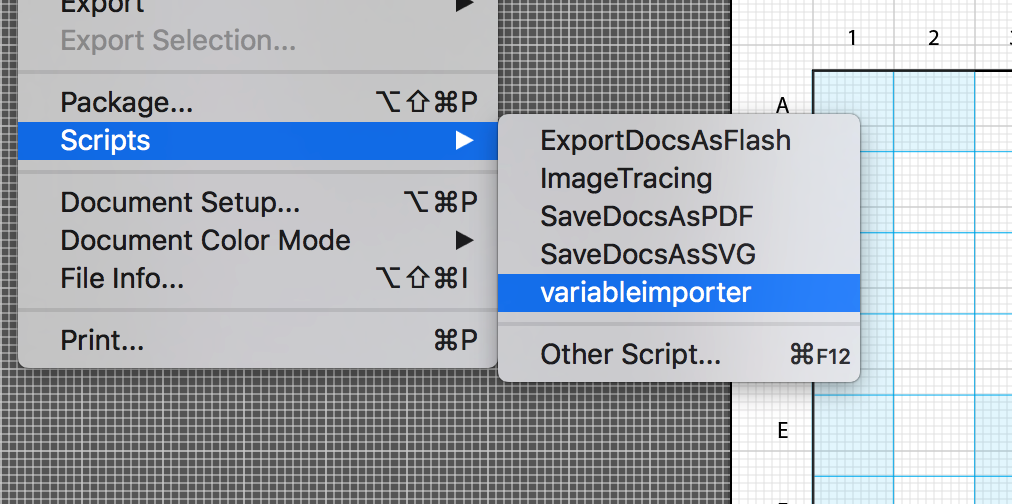
If the script is properly installed, it is available under File -> Scripts
Understanding the CSV export File Format
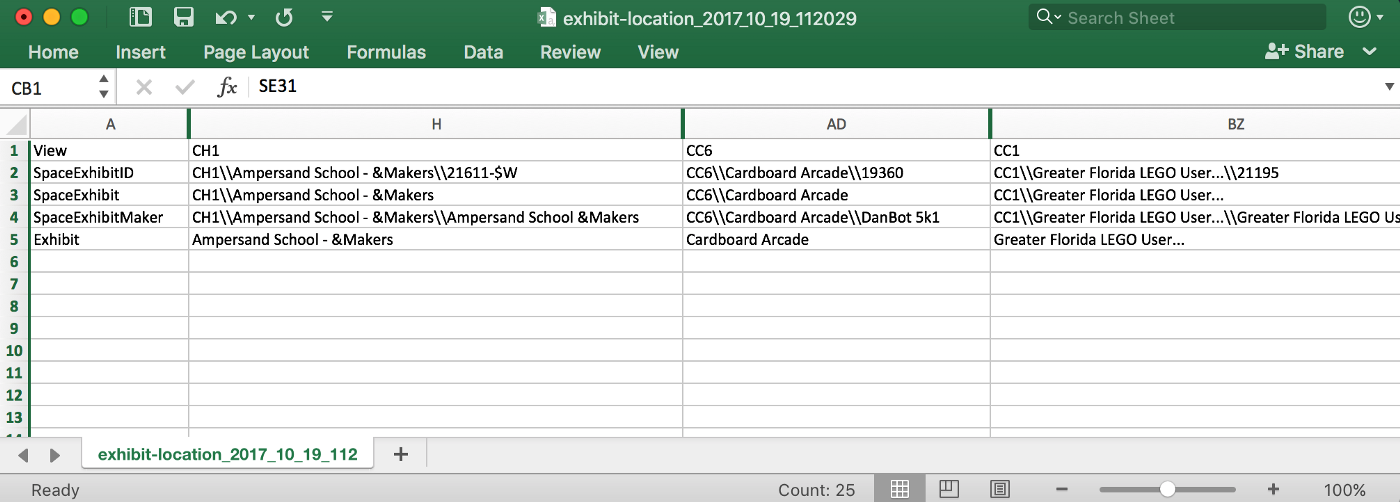
Example .csv output from our database of exhibits in a form usable by the Variable Importer Script
The .csv file format is fairly simple, with each row being a “view” of the data, and each column representing an individual grid cell in the space plan. My output currently includes all exhibits and all buildings, and I have some potential improvements, but today it works. I have multiple “views” depending on if I’m creating a space plan for the public view (exhibit name only), or if I’m creating a space plan for internal use (also includes the exhibit ID, the maker name, some status codes, etc.).
Building the Templates
Once I knew this was possible and had the data output, I started laying out the buildings in Illustrator. The “Curiosity” building is the simplest of our three buildings as it is mostly a big rectangle. You can see that I’ve created a rectangle for the walls, then added some shapes to indicate door locations. It is built to a 1mm = 1ft scale for ease. In this case, I’ve added blue shaded rectangles where we intend to place exhibits.
The next big step is adding the text fields that will be bound to variables to hold the imported data. This is a grid of text fields, and the important part is that each text field’s label is a code. The code is [Building Letter][Row Letter][Column Number] — so the top left is CA1 for Curiosity A1. That way if a someone is trying to locate “OF5”, we know that they need the “Opportunity” building, and there are not duplicate A1 spaces across the three buildings.
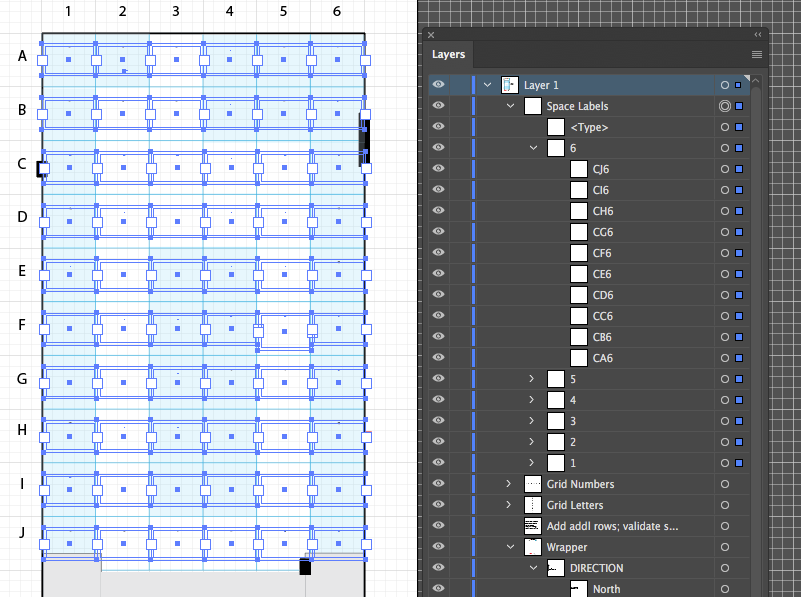
Layers are your friend with this — use them for everything, be methodical. In my case, I built one column, grouped them, then duplicated from there…I make it sound simple, but it took a LONG time to build these buildings and get everything positioned right. I was questioning the value…until I did the first import!
The templates should live on the server in the mfo-production share under the MFO20XX year folder -> space-plans. You can also likely find them on Ian’s laptop and pester him to move them to the server :)
Exporting Space Plan Data
In 2021, we automated the generation of the space plan data with the update_exhibits python script (github). Every time we update exhibits, it automatically builds the .csv files so you are always ready to import! The export is now split by building and you’ll find those files in the local directory with the python script. Also, the export now contains ALL cells — even blank ones to ensure that no old exhibits are still in the plan.
More info on the script can be found on the Call For Makers - Update Website Script page
Importing Space Plan Data
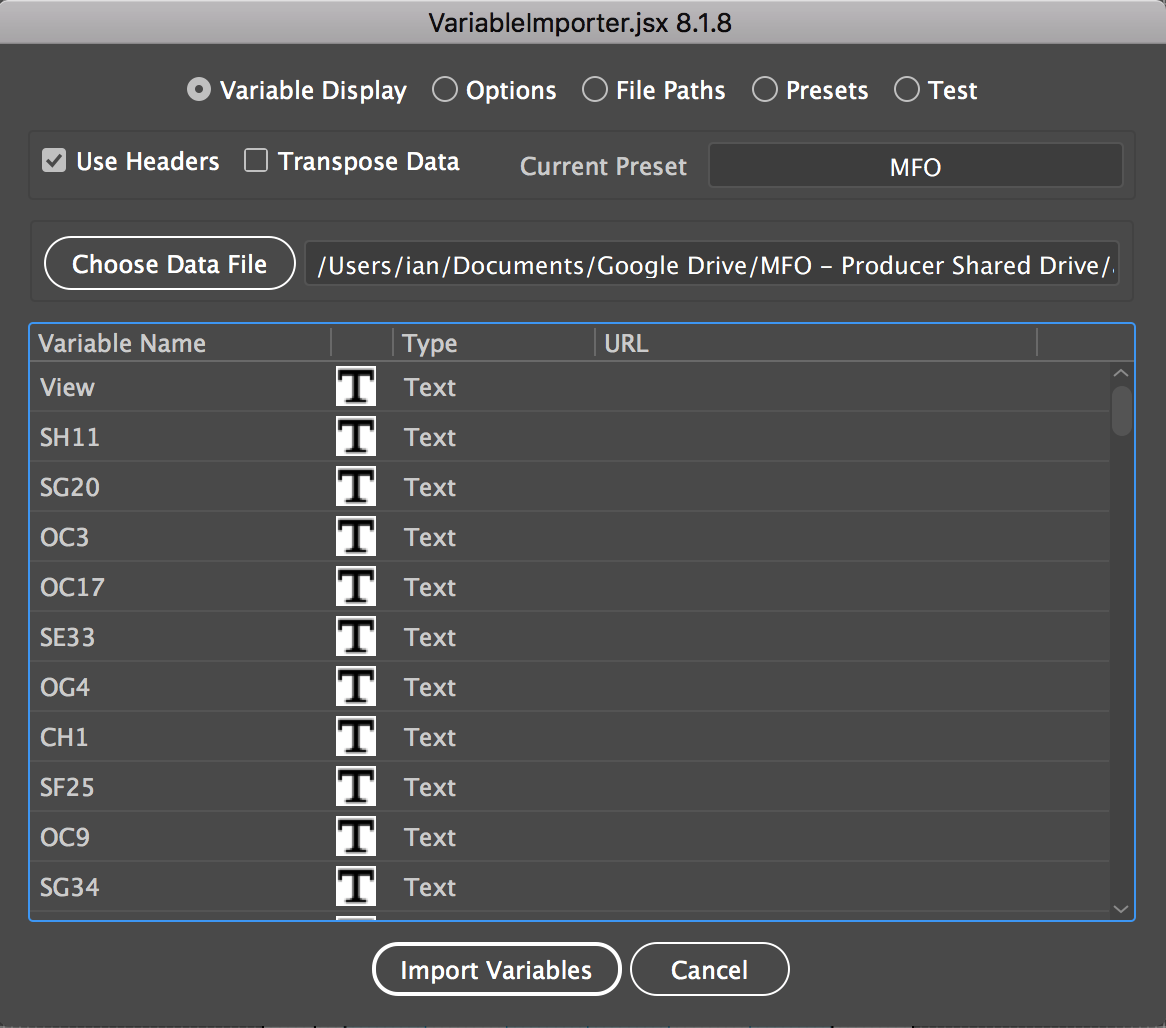
On the Variable Display tab we select the .csv file which gives us a preview of the variables in the file. I have “Use Headers” checked because my file was built with headers.
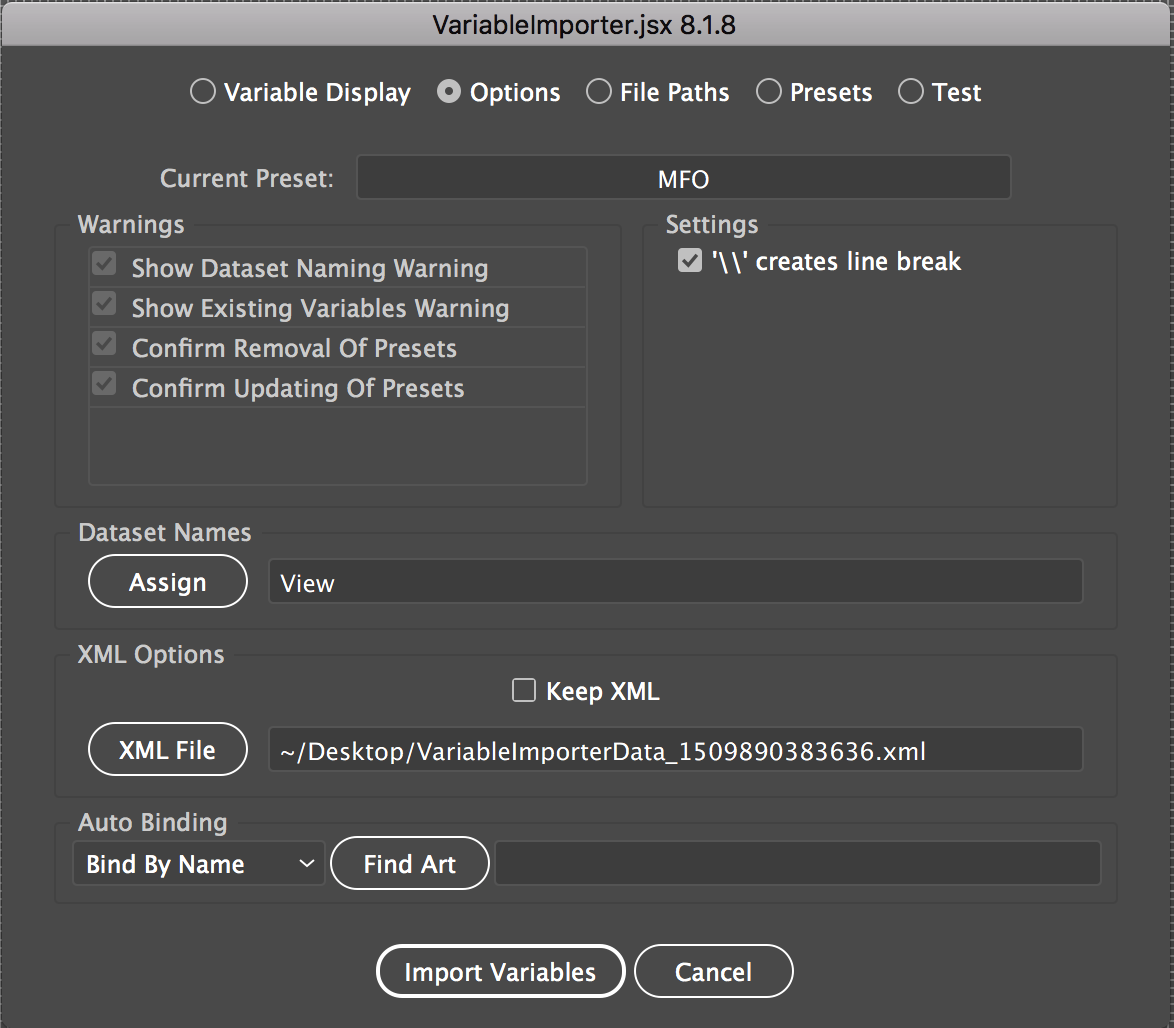
On the Options Tab, I have a few options set — ‘\’ creates line break (I have multiple lines of info for each exhibit), and “Auto Binding” is set to “Bind by Name” which means that each ROW of data in my .csv file will be bound to a different set of variables. I believe the XML File was filled in automatically by the script, I don’t remember doing anything special for it…
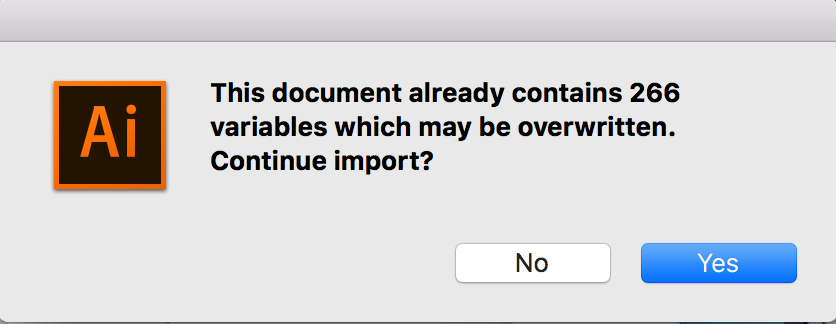
The import is VERY SLOW on the files that have a lot of variables (the other two buildings are much larger…)
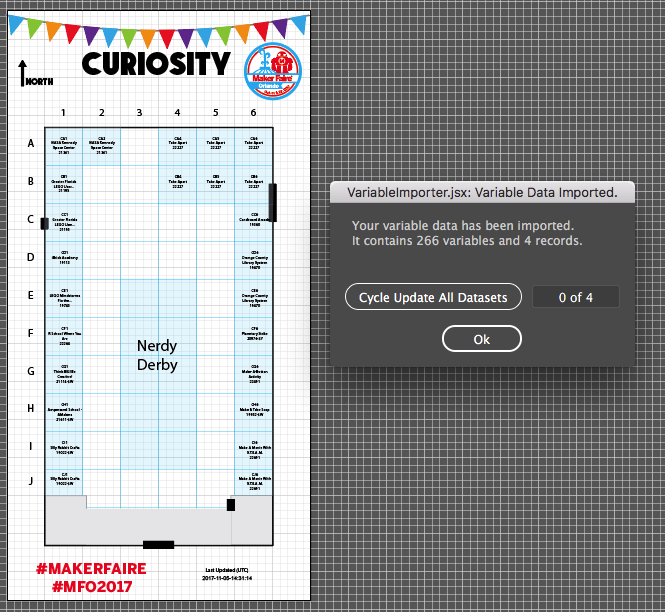
Importer Script completion — with the ability to cycle through the views
Changing the View of the Data
Once the import script finishes, you can still change the data set shown by loading the Variables window (Window -> Variables on the menu)
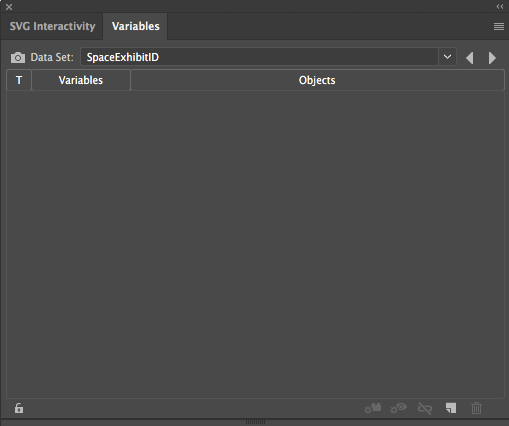
The Data Set drop down can be used to select the data shown
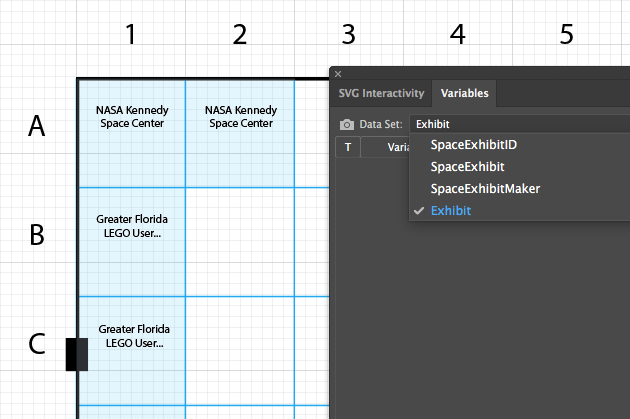
Example of the four data sets (the four rows in the .csv) — this view is only Exhibit name
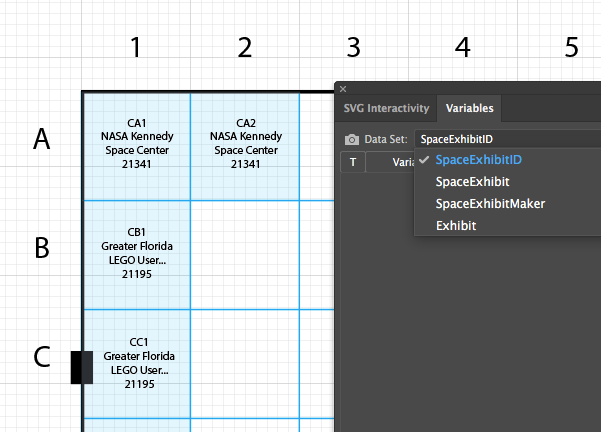
This view contains the space number, the exhibit name, the exhibit ID, and some additional data where applicable (the exhibits in the example didn’t have any of those status codes)
The Final Product
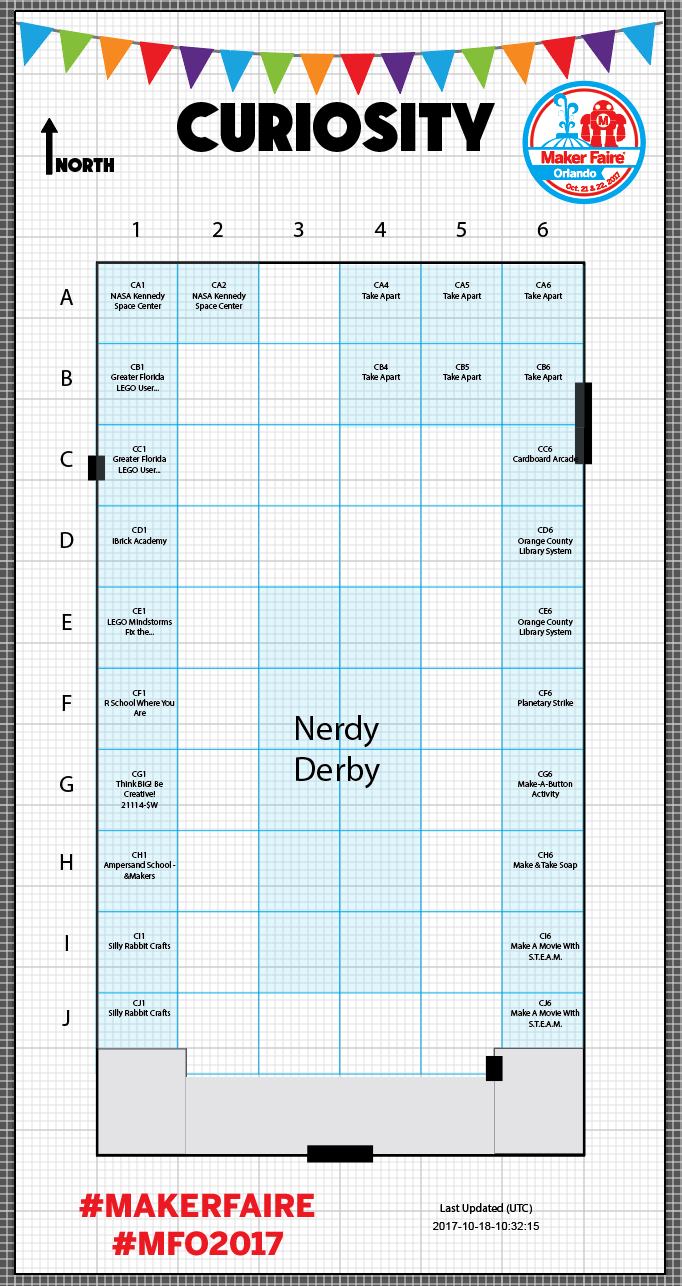
CURIOSITY building with imported data — that can now be printed as large as desired! (This is just an image - the original is a vector PDF that we’ve printed as big as needed!
Note that since the space shading isn’t automatic, I have to correct it after each import.
Space Plans in Use
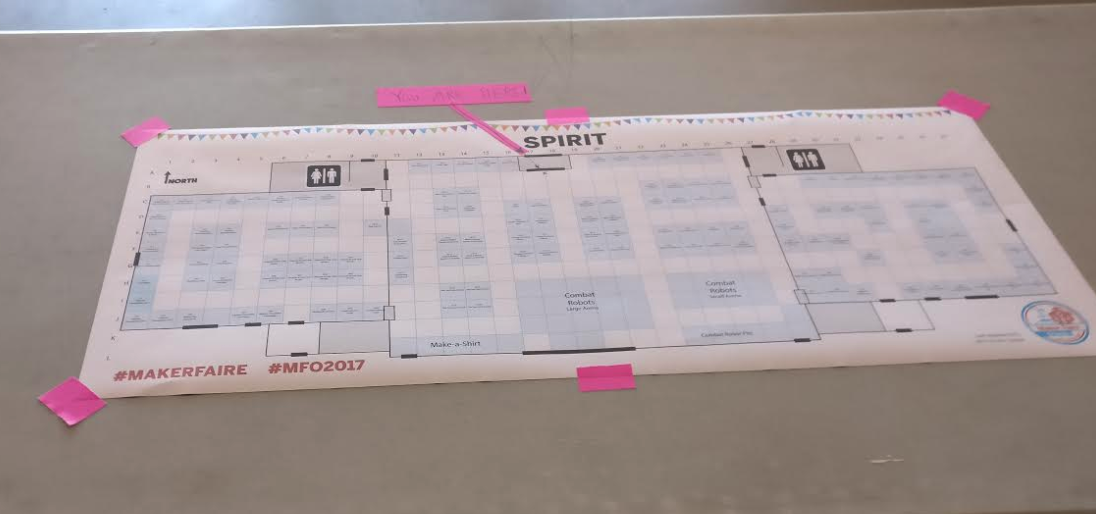
The area captain for SPIRIT taped this one to a table with a “You are here” note to help makers find their spaces during setup. Each space is also marked in chalk, but the map helps them to get to the right location quickly.

This area captain used chairs…to hold a large version at the entrance to this building…clever! (We removed this before the public arrived…)

The printed space maps complement the map that is on the program. The program highlights the major zones and key activities, then the space plan helps when someone is looking for a specific exhibit.
Enhancements we made along the way
- We moved the instructions into the playbook. Here’s the old version on Medium
Notes for the future
-
Automating the space shading would be a big time saver. (Some years, we don’t bother with the shading…)
-
Have MULTIPLE computers setup with the variable importer in case one doesn’t function at the last minute — you don’t want to be doing the install, etc. the day before the event.
If you have input / ideas / a better way — let me know — email me at ian.cole@themakereffect.org
See you at Maker Faire!